Propagation is a great way to expand your collection! Who doesn’t want to make more plants from the ones they already have?! Here we are going to cover the different types of cuttings and the different methods of propagation.
| Cuttings | Methods |
Leaf Cuttings | Stem Cuttings | Callus | Water | Soil | Division | Simple Layering | Air Layering | Propagation Box |
Stem Cuttings vs Leaf Cuttings
Leaf Cuttings
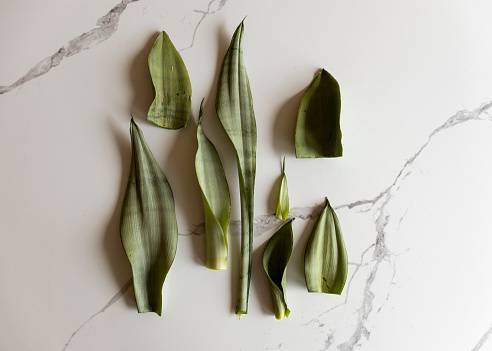
Leaf cuttings are cuttings that do not have a node attached. Not all plants have the ability to form a new plant from just a leaf cutting so it is a good idea to do a little research before you get chopping! Some plants this works for are Begonia, African violet, Peperomia, Cacti, Jade plant, Sansevieria.
For those plants that cannot form a new plant from a leaf cutting, most can still root. But will never grow any new leaves. Single Leaf Hoya Kerri is a perfect example of this.
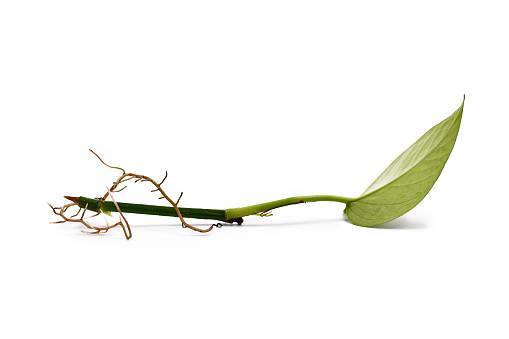
Stem Cuttings
Is where you need a portion of the main stem to form a new plant. The plant needs a node. Nodes are located where the leaf meets the main stem of your plant. For stem cuttings it generally is better to take a portion of stem with multiple leaves attached. The lower leaves will be removed from which the new roots will grow. This works well for are Syngonium, Hoya, String of Hearts, Monstera Adansonii, Grape Ivy, Heart Leaf Philodendron, Pilea
Some plants will do well with a single leaf AND a small portion of the stem, as they still need nodes, it is important not to confuse it with a leaf cutting! Some plants this works well for are Pothos, Monstera Delicious, some Philodendrons
Callus
Cacti and succulents need the cut to callus over before being propagated. This protects the cutting from rotting. Simply keep the cutting somewhere dry for 1-2 days until a callus has formed, then go ahead with the rest of the process. This can also be done for larger plants with a thicker stem of 1inch or more in diameter. It will prevent the stem from rotting while it’s propagating. Though you may be eager to get that plant propagating, this extra step will really increase your chances of success with above mentioned plants!
Methods of Propagation
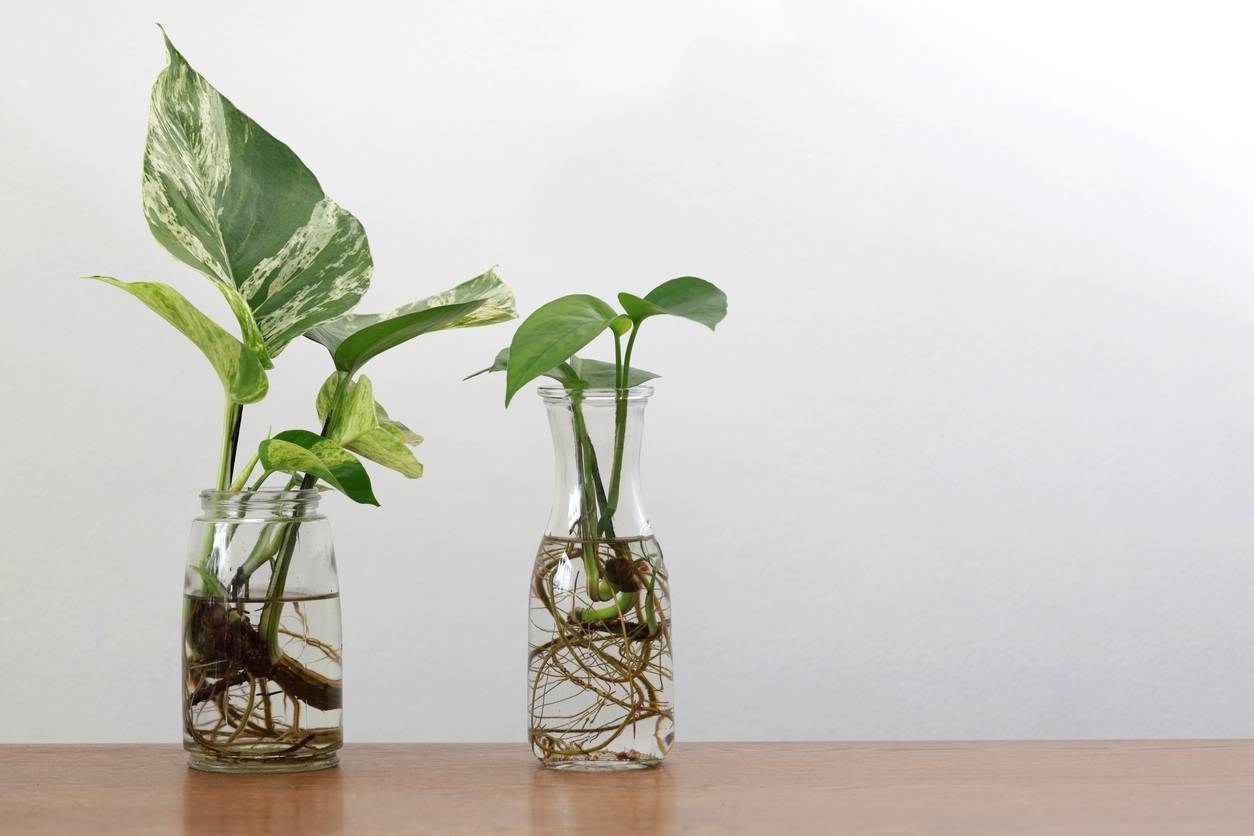
Water
Propagating in water is a one of the easiest. And great for those who like to watch as those roots begin to grow! Simply pop your cutting into a jar of water being sure to cover at least one of the nodes in water. Change the water once a week and keep it in bright indirect light.

When the roots are 1-2 inches long is the perfect time for potting up if your plan to transfer your prop to soil. Plants kept in water for too long may struggle to make the switch to soil. When potting up keep your plants soil moist for the first couple of weeks to help it settle in.
Soil
Place your cutting directly into a pot with potting soil mix. Keep soil evenly moist only allowing it to dry out once the cuttings have rooted. The best way to check for root growth with this method is by gently tugging on your cutting, once some resistance is felt roots have begun to grow.
For humidity lovers, keeping humidity high while it’s rooting really helps. A good way to do this is by placing the pot into a sealable plastic bag and sealing the bag leaving just a small portion open for airflow. Once rooted the bag can be removed.
Division
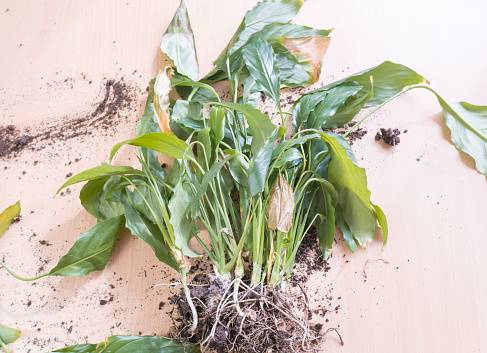
Most clump forming plants that have multiple stems at soil level can be easily propagated by division. At the time of repotting gently pry apart sections of the plant. Pruning shears may be necessary to get through the rootball. Repot into appropriately sized pots.
Simple layering
Simple layering is a great method for trailing plants. Prepare a pot with moist potting soil mix, Pin the part of the vine you want to propagate to the new potting soil without removing it from the mother plant. Once rooted you can then cut it away from the mother plant.
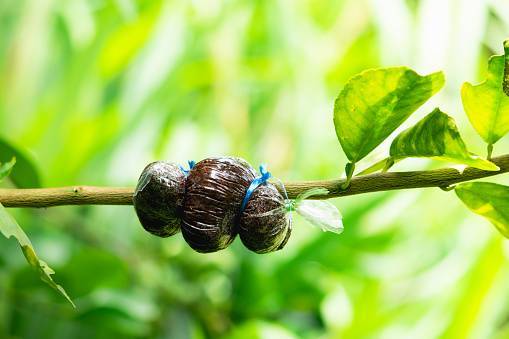
Air layering
Air layering is best for those plants that don’t like to readily propagate! With air layering first decide where you would like to propagate the plant. Remove leaves around that area. Make a small cut at a 45degree angle then continue to cut vertically along the stem 3-4inches. Dust all along the cut with rooting hormone. Using pre soaked spaghnum moss fill the cut with moss then create a ball of spaghnum moss all around that section of stem. Hold the moss in place using plastic wrap to seal in the moisture. Once roots have formed remove from the mother plant and pot up.
Propagation Box
Propagation boxes are a great way to propagate multiple cuttings at one time! You will need a clear plastic container with a lid that will act as your mini greenhouse. Put a layer of moist spaghnum moss at the bottom, Place your cuttings into the moss and place the lid lightly on top. Check every few days, the moss should remain moist from the humidity in the box. If it does begin to dry out, you can mist the moss and place the lid on a little tighter. Checking every few days also provides some airflow to the box which will prevent rot. As cuttings root you can pot them up! Keep your prop box in bright indirect light
Happy Propagating!